VS2022 libtorch-win-shared-with-deps-2.7.1+cu126 配置记录
1.安装CUDA 略过
2.安装CUDNN 略过
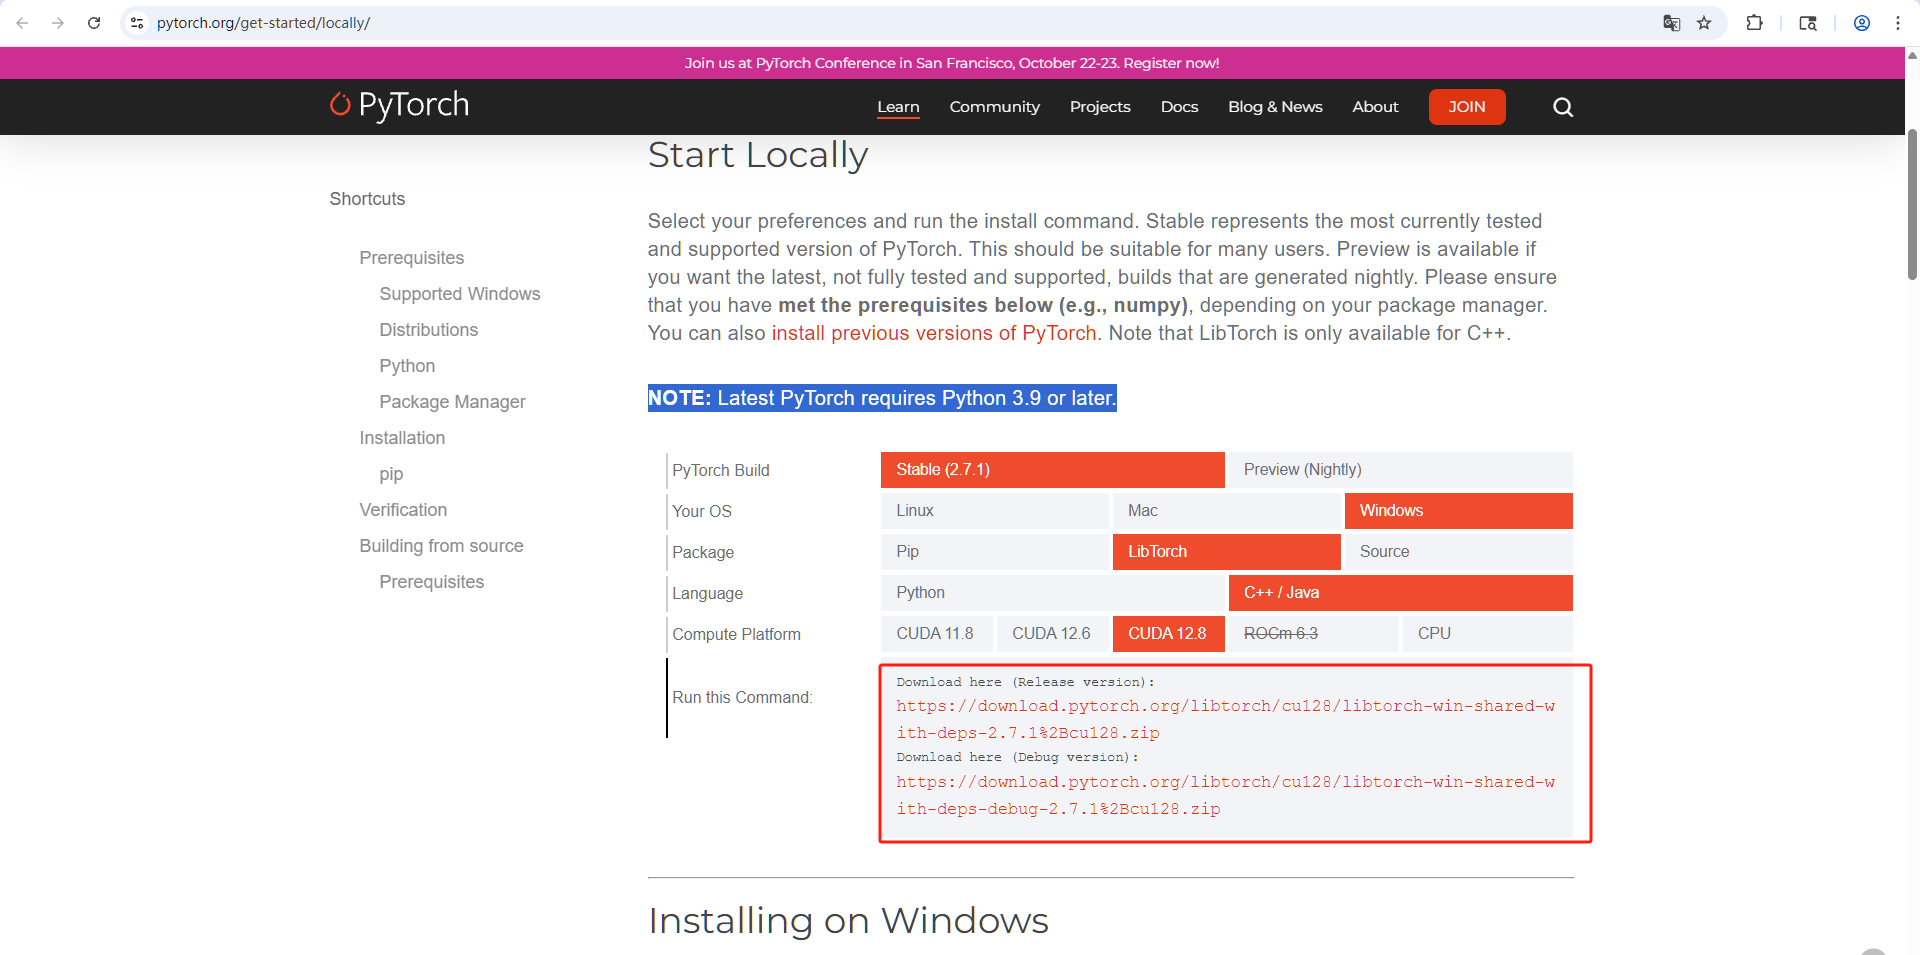
3.下载libtorch-win-shared-with-deps-2.7.1+cu126 解压
4.创建VS项目 略过
5.配置项目环境
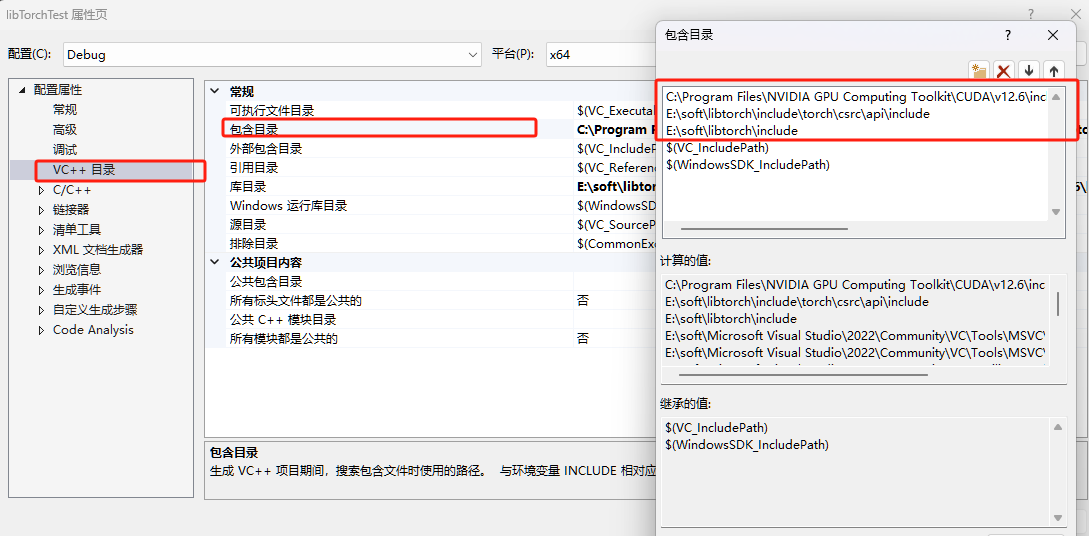
5.1 配置包含目录 属性->VC++目录>包含目录
cuda目录\v12.6\include;
libtorch目录\include\torch\csrc\api\include;
libtorch目录\include;
5.2 配置库目录 属性->VC++目录>包库目录
libtorch目录\lib;
cuda目录\v12.6\lib\x64;

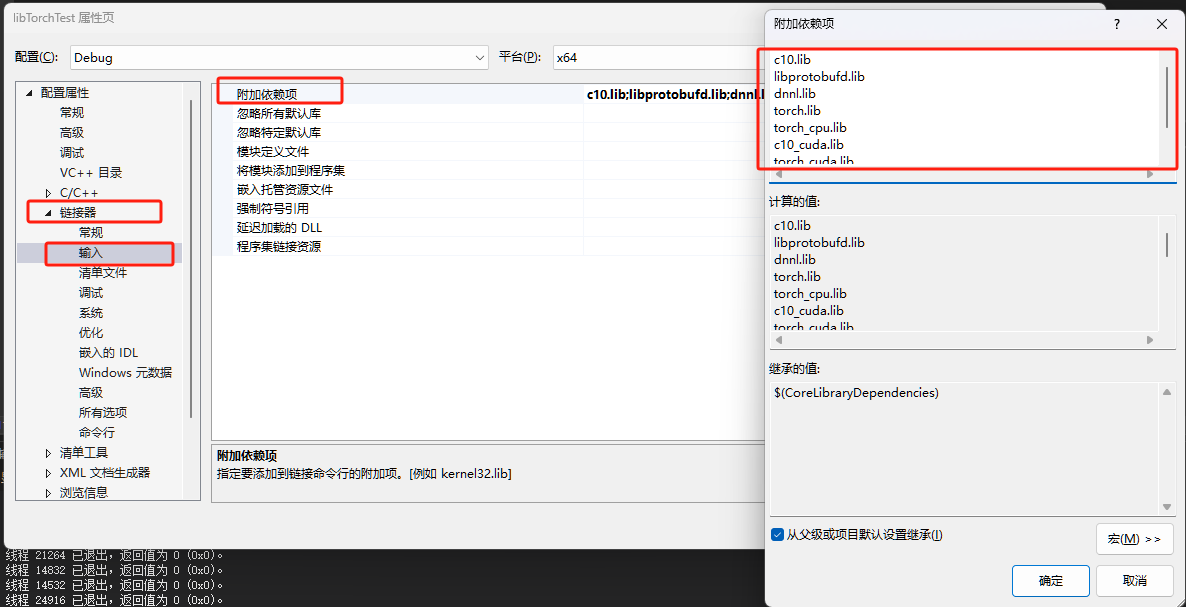
5.3 配置附加依赖项 属性->链接器>输入>附加依赖项
c10.lib libprotobufd.lib dnnl.lib torch.lib torch_cpu.lib c10_cuda.lib torch_cuda.lib
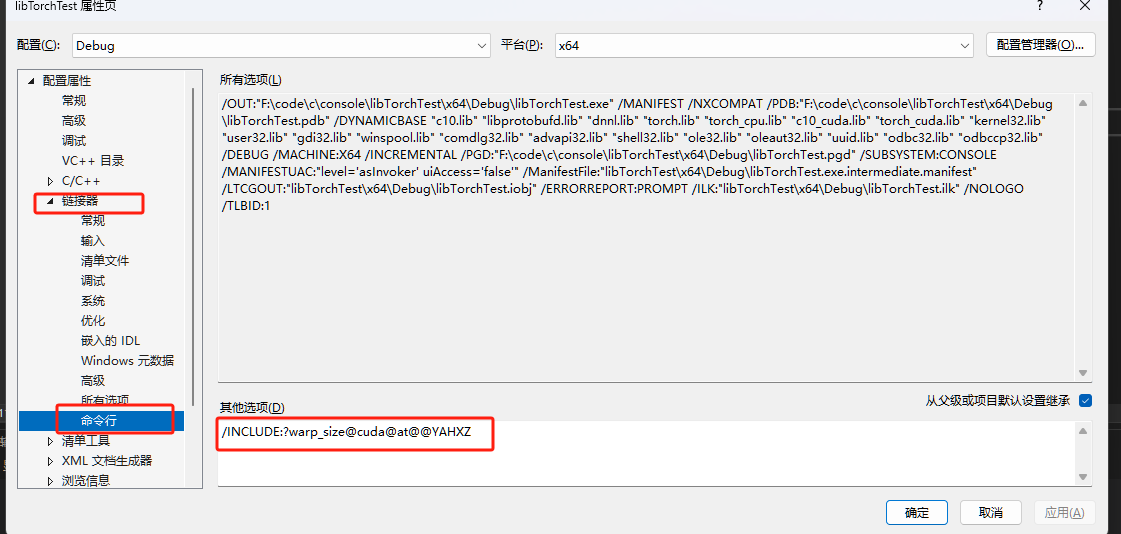
5.4 配置命令行 属性->链接器>输入>命令行
/INCLUDE:?warp_size@cuda@at@@YAHXZ
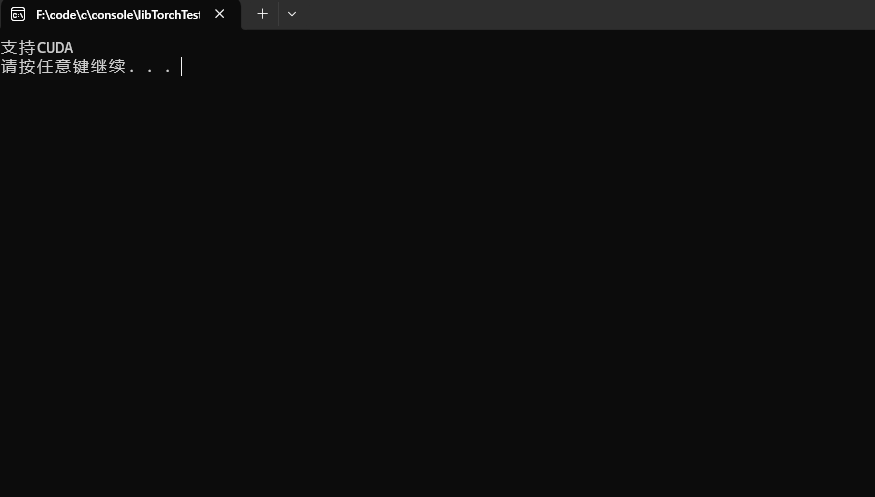
6.测试
#include <torch/torch.h>
#include<torch/script.h>
#include <iostream>

using namespace std;

int main()
{
	if (torch::cuda::is_available())
		cout << "支持CUDA" << endl;
	else
		cout << "不支持CUDA" << endl;
	system("pause");
	return 0;
}
评论 (0)